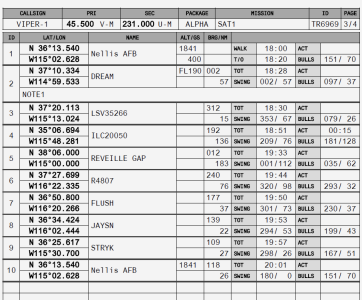
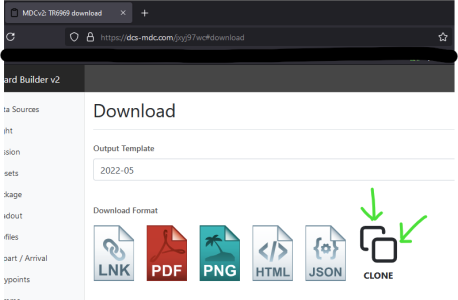
As a wingman and a member of a flying team - its important that you are able to "do your part" and i.e. generate the datacard for an upcoming mission.

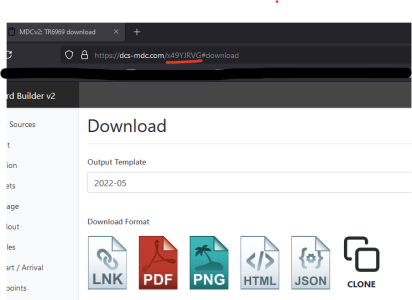
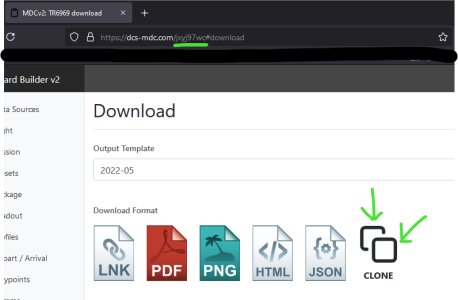
DCS-MDC tool is available through https://mdc.455aew.com which takes you to https://dcs-mdc.com
Whilst primarily a mission datacard generator - it can also serve as a useful flight planning aid.
In this post, I´ll walk through generating an MDC from start to finish, and anchor on some of the flight planning tips and tricks. I´ll ignore the Importing data through CombatFlite at the moment, and assume that I already know the waypoints etc that I need, so we´ll leave that out for now.
First of all when you open the site, you´re presented with a menu as such:
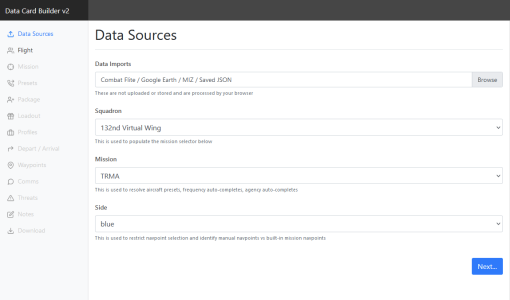
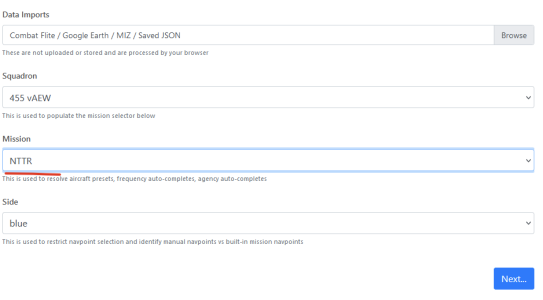
Select 455 vAEW from the squadron list.

Select "Mission" - at the time of writing we have KOLA and NTTR available. What this does is populate a database of waypoints and presets available in the mission we have uploaded. More on that later. In this case we´ll select NTTR and hit Next.
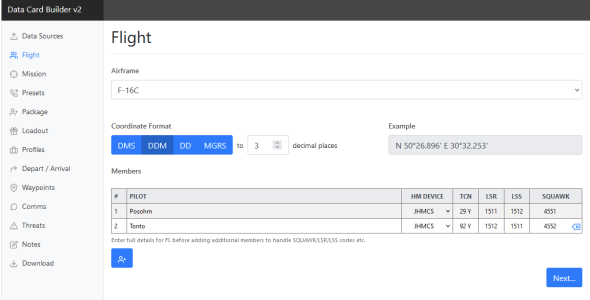
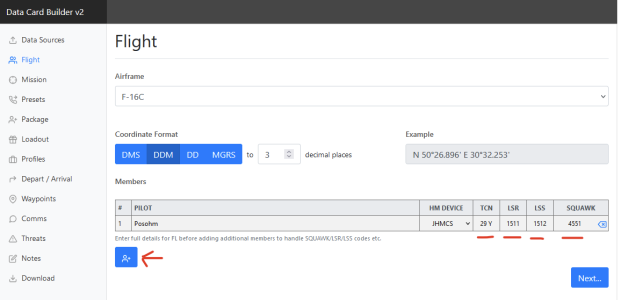
Select the relevant airframe, leave the Coordinate format as DDM which is the standard coordinate set that's used in the F16, then write in the pilots ( this is optional, but useful ).
Hint: Completely fill out the info for one pilot, e.g. TCN ( Air to Air Tacan ), LSR ( Laser Code ), LSS ( Laser Search Spot) and Squawk. When you add the next pilot, those fields will automatically increment in sequence, and set the correct tacan channel separation.
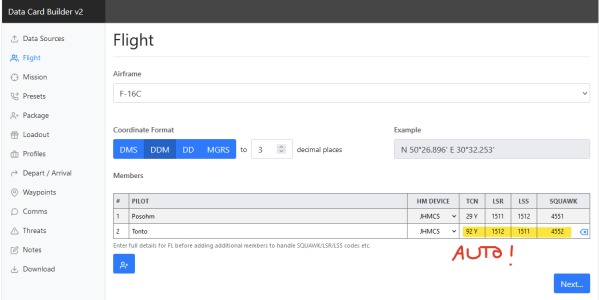
Hit next to proceed to the Mission Page
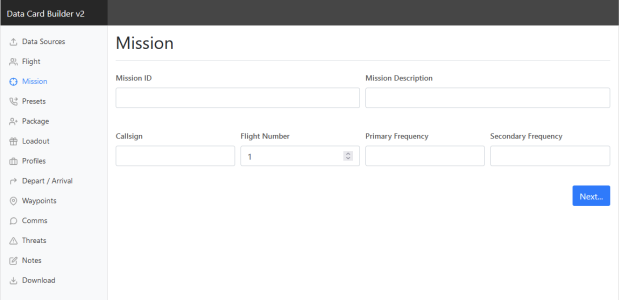
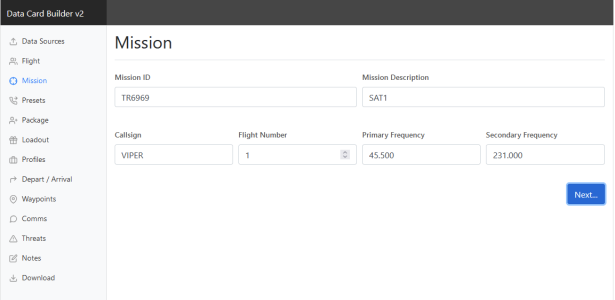
Fill in the details based on details you know or skip this until later - the primary and secondary frequency are meant for the primary and secondary Intra Flight Frequencies.
Example below - hit next when done.
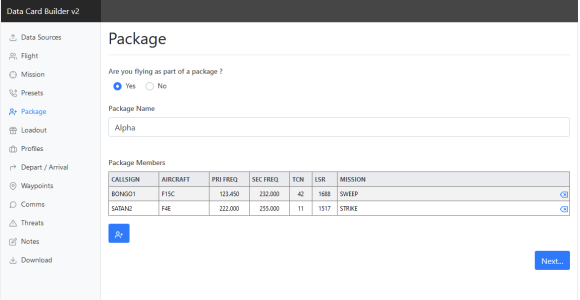
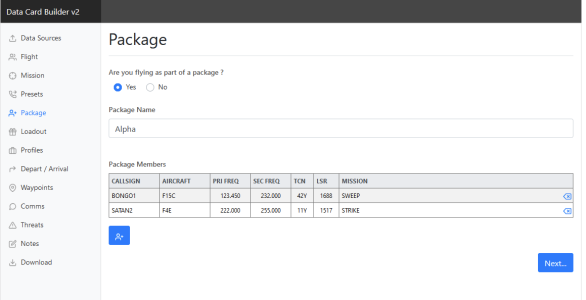
Lets assume we are flying as a part of a package, just to cover all the bases - so answer yes when asked - and fill out the details as necessary - example below:
Next up is the Loadout page - I usually skip most of this except the Joker and Bingo values -
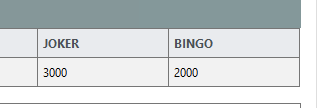
You will not get automatic TOLD data or anything from this, but if you fill everything out correctly, at least you´ll get the Gross Weight.
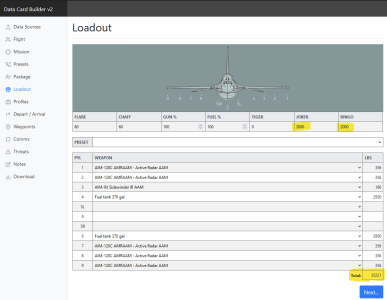
Click next to proceed to the profiles section:
This page is somewhat self explanatory, use the Additional Loadout Information free text area for stuff like arming delay, ripple settings, etc. Whatever is useful.
I usually leave the countermeasures stuff alone.
Fill out the harm tables per squadron standards or as planned/briefed - when clicking the names - you can partially write the system in and autocomplete the rest of the info:
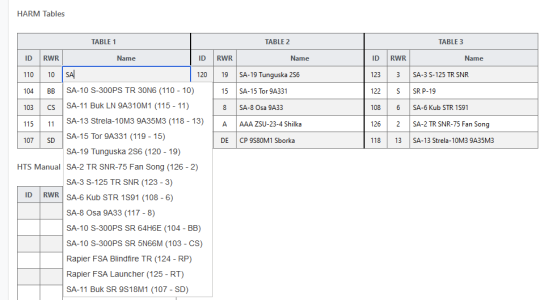
I´ll not cover the HTS classes in this setup, so just leave it on its default setting. Click next when done.
Departure
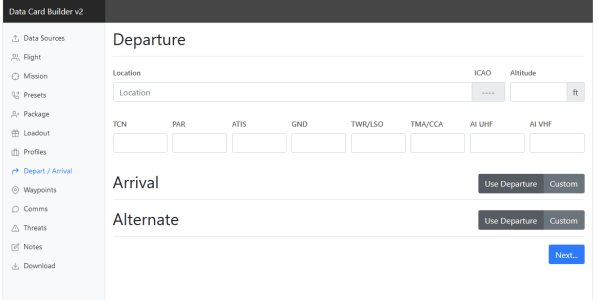
On this page, you can select the departure, arrival and Alternates - click Location and start typing, either the ICAO code or the airfield´s name, e.g Nellis. If the airfield is already in the database, you should see it in the drop down list, select it from there and the fields will auto populate - provided those things have been entered beforehand behind the scenes. In this case they havent, and the only things that come up are the airfield altitude (MSL), TACAN and AI frequencies.
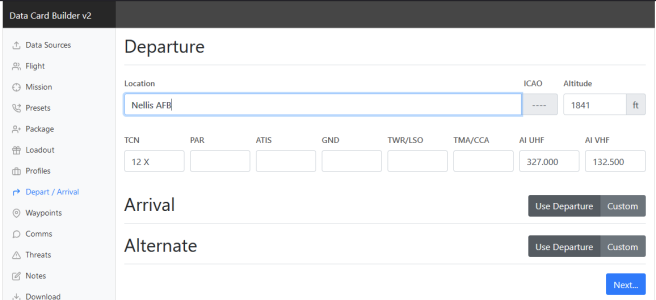
If you´re headed out and back, then select "use departure" - this will set the arrival airfield the same as your Departure airfield. Same goes for Alternate. Hit next to continue.
Waypoints:
This is where the meat is:
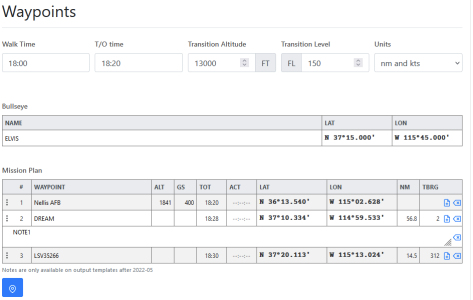
Walk time is what we call "Step" time, and should be the time where we essentially plan to load up the sim and hit the ramp. T/O time is as you guessed, is the planned takeoff time.
Enter the correct Transition Altitude and Level if its not correct already, leave the units in nm and kts
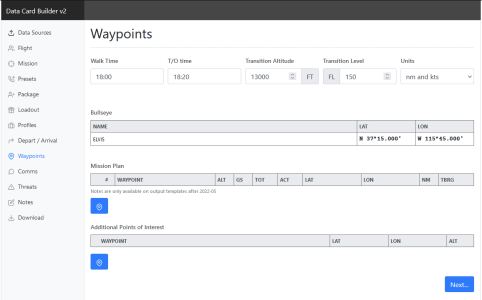
The bullseye point .should be autopopulated, in this case its ELVIS.
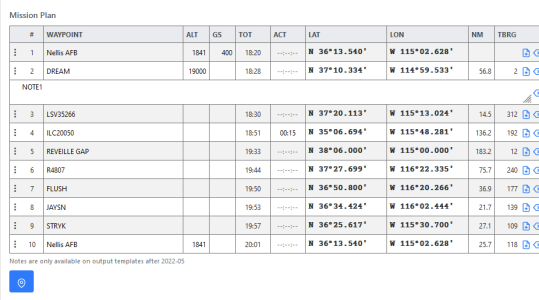
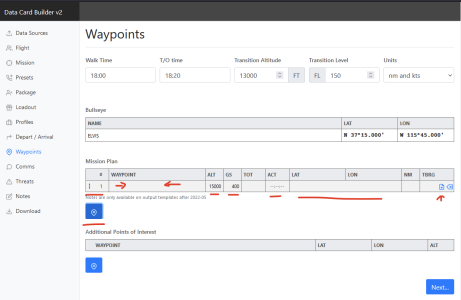
Next, start adding waypoints by clicking the balloon in the mission plan to add the first waypoint. Waypoint 1 will be generated. Add Nellis as waypoint 1 by clicking on the Waypoint field
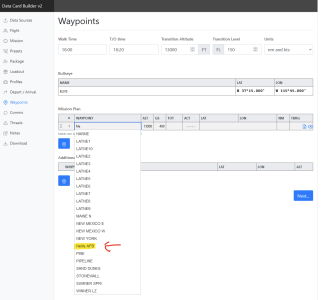
Start typing and select Nellis AFB from the drop down:
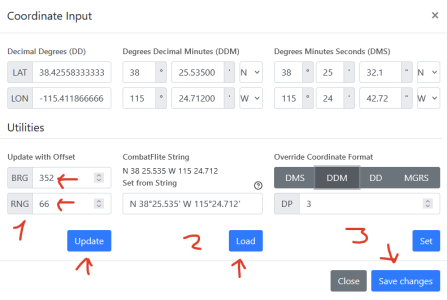
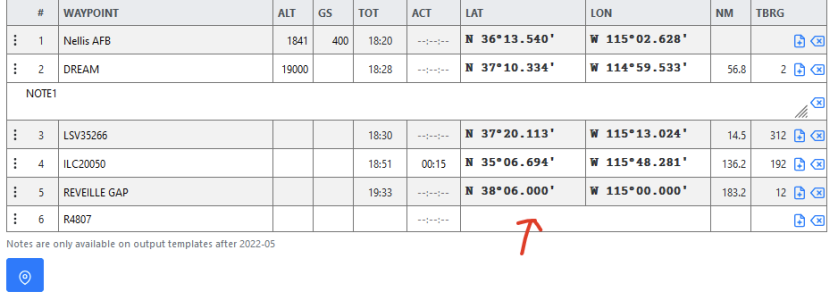
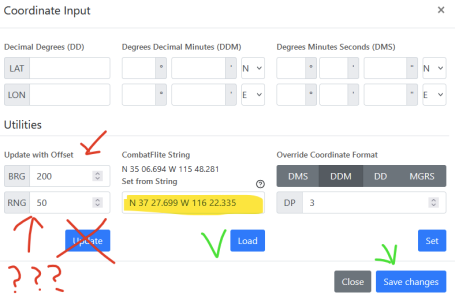
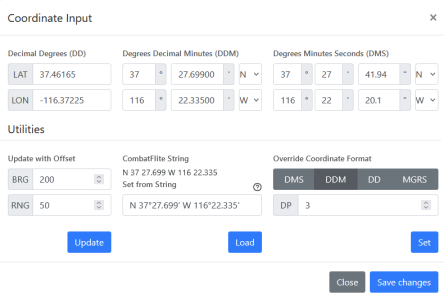
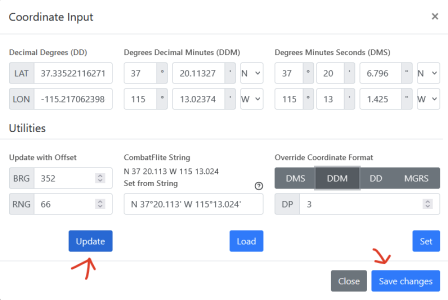
You should see that the waypoint details are auto populated with the Altitude, planned Ground Speed, calculated TOT of the waypoint, the LAT and LON. You can then modify any of these fields to a desired value. The ACT is for "activity" in the format HH:MM:SS and denotes how long you intend to "hold" at that waypoint. Clicking on the lat or long field will bring up a menu where you can manipulate the coordinates of the waypoint ( more on that later). Clicking on the little plus at the far right allows you to enter any notes for the waypoint you desire.

The Ground Speed is assumed to be always the same unless you change it between waypoints. Add waypoint two by clicking on the balloon again.
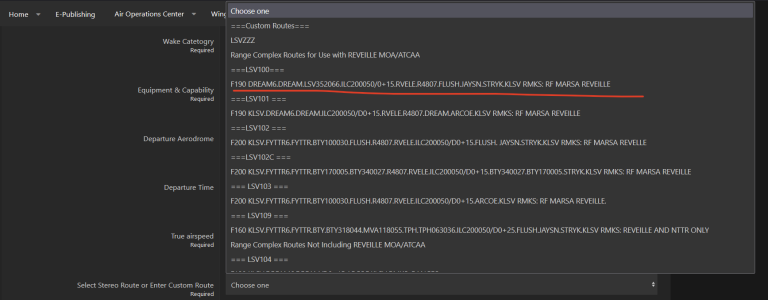
Lets assume here that we are going to fly the LSV100 stereo route out of Nellis ( you can find it on the flight plan form )
( See next post)

DCS-MDC tool is available through https://mdc.455aew.com which takes you to https://dcs-mdc.com
Whilst primarily a mission datacard generator - it can also serve as a useful flight planning aid.
In this post, I´ll walk through generating an MDC from start to finish, and anchor on some of the flight planning tips and tricks. I´ll ignore the Importing data through CombatFlite at the moment, and assume that I already know the waypoints etc that I need, so we´ll leave that out for now.
First of all when you open the site, you´re presented with a menu as such:

Select 455 vAEW from the squadron list.

Select "Mission" - at the time of writing we have KOLA and NTTR available. What this does is populate a database of waypoints and presets available in the mission we have uploaded. More on that later. In this case we´ll select NTTR and hit Next.

Select the relevant airframe, leave the Coordinate format as DDM which is the standard coordinate set that's used in the F16, then write in the pilots ( this is optional, but useful ).
Hint: Completely fill out the info for one pilot, e.g. TCN ( Air to Air Tacan ), LSR ( Laser Code ), LSS ( Laser Search Spot) and Squawk. When you add the next pilot, those fields will automatically increment in sequence, and set the correct tacan channel separation.


Hit next to proceed to the Mission Page

Fill in the details based on details you know or skip this until later - the primary and secondary frequency are meant for the primary and secondary Intra Flight Frequencies.
Example below - hit next when done.

Lets assume we are flying as a part of a package, just to cover all the bases - so answer yes when asked - and fill out the details as necessary - example below:

Next up is the Loadout page - I usually skip most of this except the Joker and Bingo values -

You will not get automatic TOLD data or anything from this, but if you fill everything out correctly, at least you´ll get the Gross Weight.

Click next to proceed to the profiles section:
This page is somewhat self explanatory, use the Additional Loadout Information free text area for stuff like arming delay, ripple settings, etc. Whatever is useful.
I usually leave the countermeasures stuff alone.
Fill out the harm tables per squadron standards or as planned/briefed - when clicking the names - you can partially write the system in and autocomplete the rest of the info:

I´ll not cover the HTS classes in this setup, so just leave it on its default setting. Click next when done.
Departure

On this page, you can select the departure, arrival and Alternates - click Location and start typing, either the ICAO code or the airfield´s name, e.g Nellis. If the airfield is already in the database, you should see it in the drop down list, select it from there and the fields will auto populate - provided those things have been entered beforehand behind the scenes. In this case they havent, and the only things that come up are the airfield altitude (MSL), TACAN and AI frequencies.

If you´re headed out and back, then select "use departure" - this will set the arrival airfield the same as your Departure airfield. Same goes for Alternate. Hit next to continue.
Waypoints:
This is where the meat is:
Walk time is what we call "Step" time, and should be the time where we essentially plan to load up the sim and hit the ramp. T/O time is as you guessed, is the planned takeoff time.
Enter the correct Transition Altitude and Level if its not correct already, leave the units in nm and kts

The bullseye point .should be autopopulated, in this case its ELVIS.
Next, start adding waypoints by clicking the balloon in the mission plan to add the first waypoint. Waypoint 1 will be generated. Add Nellis as waypoint 1 by clicking on the Waypoint field

Start typing and select Nellis AFB from the drop down:

You should see that the waypoint details are auto populated with the Altitude, planned Ground Speed, calculated TOT of the waypoint, the LAT and LON. You can then modify any of these fields to a desired value. The ACT is for "activity" in the format HH:MM:SS and denotes how long you intend to "hold" at that waypoint. Clicking on the lat or long field will bring up a menu where you can manipulate the coordinates of the waypoint ( more on that later). Clicking on the little plus at the far right allows you to enter any notes for the waypoint you desire.

The Ground Speed is assumed to be always the same unless you change it between waypoints. Add waypoint two by clicking on the balloon again.
Lets assume here that we are going to fly the LSV100 stereo route out of Nellis ( you can find it on the flight plan form )
( See next post)


